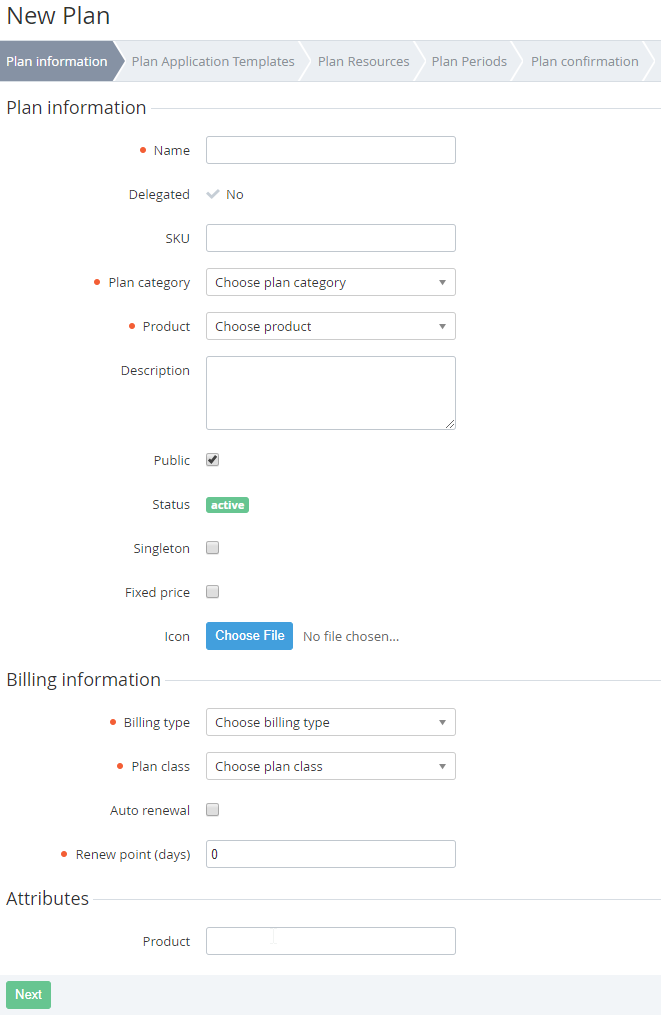
Plan Information by Microsoft CSP program
To add information about the Plan on the Plan information step, complete the following steps:
- Enter a name of the plan in the Name field.
- Select a category of the Plan in the Plan category list (see Managing Plan Categories).
- In the Product list, select a Product that is related to the Plan.
You can type additional information about the Plan in the Description field. This information displays to customers in the online store and the Customer Control Panel.
You can use HTML when filling in the Plan description.
- Select the Public checkbox to make the plan available for sale.
- Select the Singleton checkbox to restrict a number of subscriptions which are based on this Plan. If the Singleton checkbox is set, a customer can order a Subscription on the Plan only once. The second Subscription will be available only if the status of the previous Subscription is Deleted.
- Select the Fixed price checkbox to restrict change of the Subscription price if the Manager has changed the price of the Subscription. If the Fixed price checkbox is set, the customer can pay and order additional resources by fixed price. The new price will be applied only after the Subscription was renewed by the Customer.
- Click the Choose File button to select the Icon for created plan. This logo will be displayed to customers in the Customer Control Panel.
- Select Plan class in the Plan Class list (see Managing Plan Classes).
- Select the Auto renewal checkbox to activate the auto-renewal option for subscriptions.
- In the Renew point field, enter a number of days before the Subscription will expire when a customer receives the bill to renew the Subscription.
- Fill additional information in the Attributes group if these attributes were created previously (see Managing Attributes).
- Click Next. The Workspace displays the Plan Application Templates step (see Plan Application Templates).


