Ordering a "Microsoft Azure" Subscription
To start using Microsoft Azure order a Microsoft Azure Subscription with an endless period (see Ordering an Application for registered Users in the Customer Control Panel Guide).
The first Azure Subscription ordering includes two additional steps:
- You need to accept the Microsoft Cloud Agreement to proceed with Subscription ordering.
- You will be asked to create a new Microsoft Azure account or add an existing one.
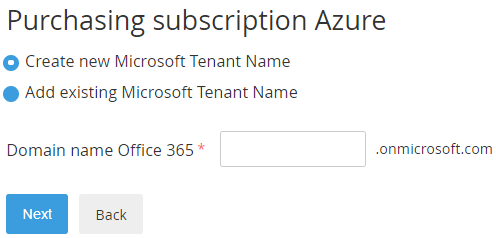
- To create a new Azure account:
- Select Create new Microsoft Tenant Name.
- In the Domain name Office 365 type the name of your subdomain (for example, example.onmicrosoft.com). The domain name Office 365 is used to create your username (yourname@example.onmicrosoft.com).
- Click Next.
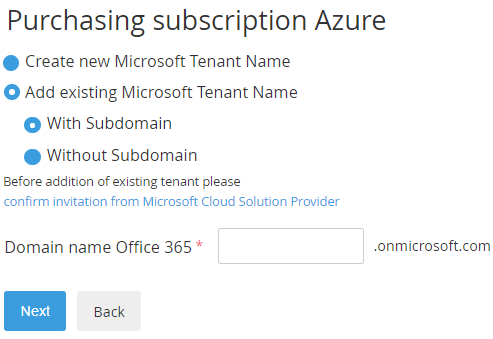
- To add an existing Azure account:
- Select Add existing Microsoft Tenant Name.
- Select With Subdomain or Without Subdomain.
- In the Domain name Office 365 type the name of your subdomain or domain.
- Click confirm invitation from Microsoft Cloud Solution Provider. You will be redirected to a new page. Follow the instructions to confirm the Microsoft Cloud Solution Provider invitation.
- Click Next.
If in the settings for the Office365 plugin for the Microsoft Azure service the Disable new Tenant creation checkbox is selected, the Create new Microsoft Tenant Name option is unavailable and by default, the Add existing Microsoft Tenant Name > With Subdomain option is selected.
- To create a new Azure account:
After the Azure Subscription is created, you will receive a confirmation email, and an Entry Point will appear on the Applications Dashboard (see Working with Lists of Applications).
If you have created a new Microsoft Tenant, the confirmation email will contain a login and password to access the Microsoft Partner Center.
Use the Entry Point menu to manage the Azure Subscription (see Управление подпиской на услугу «Microsoft Azure»). Click the Entry Point to access the Microsoft Azure Portal (see Accessing the Microsoft Azure Portal).