Manage Microsoft NCE licenses
Use the Service Management section of the Customer Control Panel to manage the licenses purchased within all Microsoft subscriptions of your account.
To access the section, you may need to confirm the invitation from the reseller. Follow the instructions in the selected subsection:
- Click the invitation link.
- Log in to the Microsoft portal with the Global Admin role.
- Confirm the invitation.
- Return to the Customer Control Panel and refresh the page.
In this article:
View the license usage
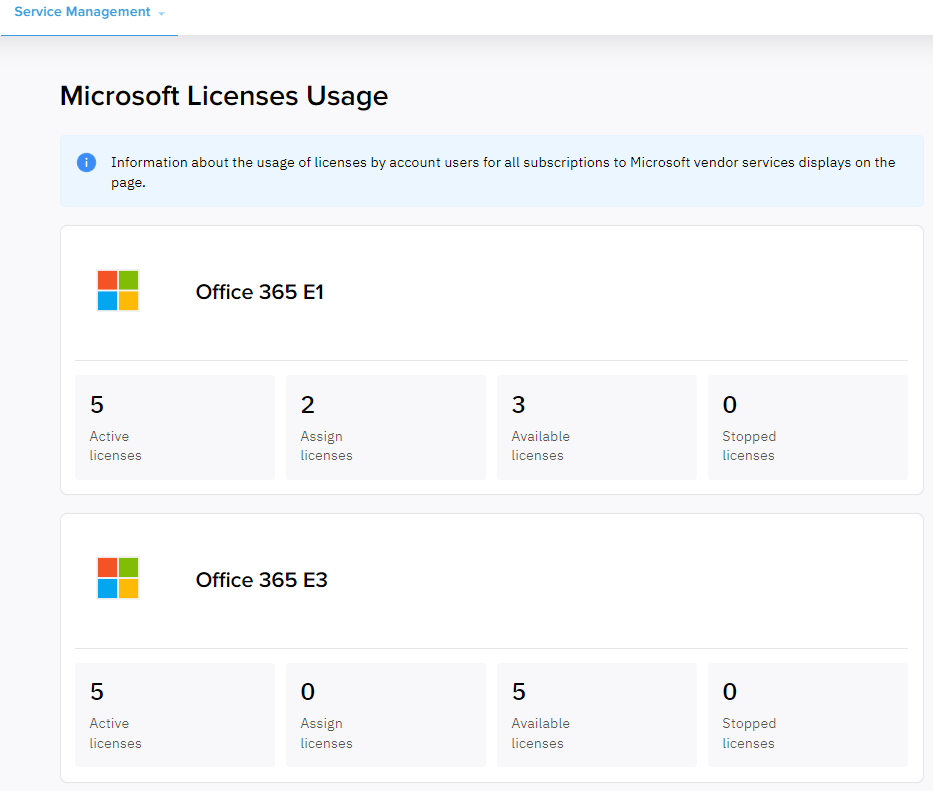
To view the number of Microsoft licenses, go to Service Management > Microsoft Licenses Usage. A page with the cards of the purchased Microsoft licenses and the following total numbers without a breakdown by subscription is displayed:
- Active licenses.
- Assigned licenses.
- Available licenses as the difference between the number of active and assigned licenses.
- Stopped licenses.
Assign licenses
To view the list of users of your Microsoft tenant and assign or remove their licenses:
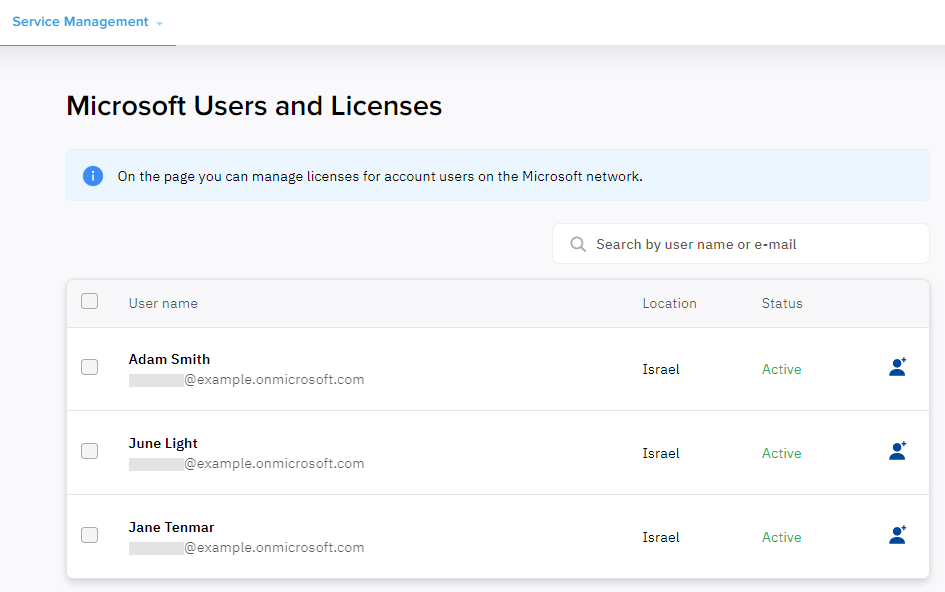
- Go to Service Management > Microsoft Users and Licenses. The list of users of your Microsoft tenant is displayed with the following columns:
- A check box to select up to 10 users for bulk license management.
- User name — the full name and email of a user of your Microsoft tenant.
- Location — a country or region where the user will use licenses. If the user location is not specified, the reseller country or region is set with the first license assignment.
- Status — the user status. It does not limit license management.
- An icon to manage the user licenses.
If your Microsoft tenant has more than 10 users, pagination is used for the list. To go to the next or any other page, use the pagination buttons at the bottom of the page.
You can find a user in the list by part of its name or email. Above the list, in a field with the icon, start entering the name or email of the required user. The list of users is automatically updated regarding your input.
- Select the required users:
- If you want to manage licenses for only one user, click in the corresponding row.
- If you want to manage licenses for several users at once:
- Select the checkboxes in the corresponding rows. The pop-up panel appears at the bottom of the page with buttons and the number of the selected users. To select all users currently displayed in the list, select the checkbox in the column heading.
- At the bottom of the page, click Assign licenses.
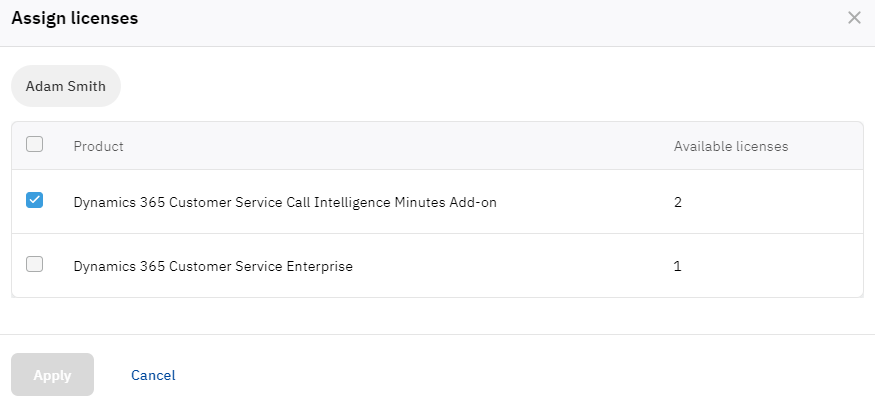
- On the Assign licenses page, check the licenses already assigned to the selected users:
- You can remove a user from the list if it has several users.
- The list of licenses has the following columns:
- A checkbox that displays whether a license is assigned to all selected users.
- Product — the license name.
- Available licenses — the number of licenses you can now assign.
- Select the checkboxes of the licenses you want to assign to all selected users and clear the checkboxes of the licenses you want to remove. The number of available licenses is updated on the go. A checkbox cannot be selected if your Microsoft tenant does not have enough available licenses to assign to all selected users.
- Click Apply.


