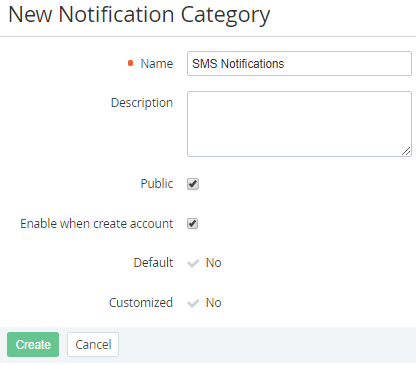
Creating a Notification Category
The new created Notification Category is also created for all downline Resellers (see Delegating UI Templates, Notification Templates, Event Holders and Notification Categories).
To create a Notification Category:
- Sign in to the Operator Control Panel.
- On the Navigation Bar go to Notification Categories (see Navigation). The list of Notification Categories is displayed (see Viewing the List of Notification Categories).
Click the Create button on the Toolbar. The New Notification Category page appears on the screen.
Since the Notification Category is delegated to all downline Resellers, it must have a unique name that does not match the name of any other Notification Category of all downline Resellers.
- In the Name field, type a name of the category.
- In the Description field, enter additional information about the category.
- Select the Public checkbox to make the notification category available for use in the Customer Control Panel (see Notification settings).
Select the Enable when create account checkbox to turn on sending the notifications from this group to all new created Accounts by default.
The Default attribute is set to Yes if the Notification Category was installed by default (for Operator). The attribute is set to No if the Category was inherited or created by Reseller Manager (see Reseller's settings inheritance).
The Customized attribute is set to Yes if the Notification Category was edited by a Reseller Manager (Viewing and updating Notification Category's details). The attribute is set to No for:
- the new Notification Categories created by a Reseller Manager (not inherited);
- the inherited Notification Categories that were not edited or that were reverted back to the state of the corresponding Notification Category of the upline Reseller (see Reverting the state of delegated Notification Category).
- Click Create. The new Category will be created and added in the List of Notification Categories of the current Reseller and all its downline Resellers.


