Creating a correction
To create a correction:
- Go to Corrections (see Navigation). The list of corrections is displayed (see Viewing the list of corrections).
- Click Create. The New Correction page is displayed.
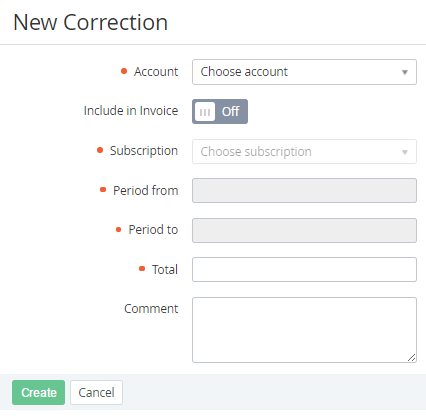
- In the Account list, select the required account. All accounts are available in the list, regardless of their status.
- If it is required to include the correction in an invoice (see Managing invoices):
- Turn On the Include in Invoice switch. The following elements become available: Subscription, Period from, and Period to.
In the Subscription list, select the subscription related to the correction.
The subscription is used to determine the billing day (see Managing service terms) after which the invoice with the correction will be created.
In the Period from and Period to fields, using the calendar, define the period related to the correction.
The period is used only to inform the customer and does not affect in which invoice the correction will be included. A correction is always included in an invoice for the billing period in which it was approved (see Approving a correction).
- In the Total field, enter the amount of the correction with up to two decimals. If the correction is linked to a postpaid subscription, it changes the current debt for this subscription rather than the account balance,
- Optionally, in the Comment field, enter additional information about the correction.
- Click Create. The correction will be created in the Approval required status. After that, it requires approval (see Approving a correction).