Creating a connector based on the Manual Provisioning plugin
To create a connector for a service that requires manual operations for provisioning:
- Go to Connectors (see Navigation). The list of connectors is displayed (see Viewing the list of connectors).
- Click Create. The New Connector page is displayed.
- In the Plugin list, select ManualProvisioning Plugin.
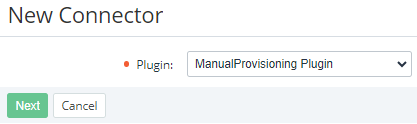
- Click Next. The page for entering information about the connector is displayed.
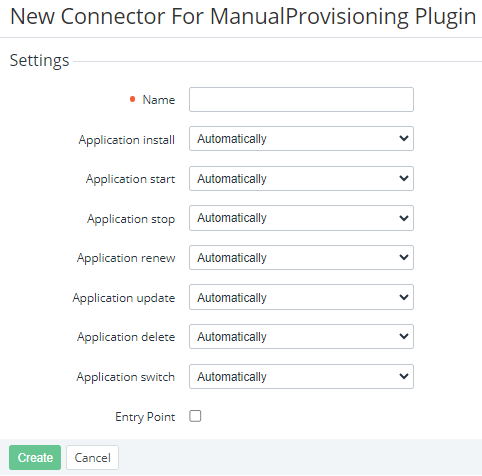
- In the Name field, enter the name of the connector.
- Using the following lists, select the required modes of the service provisioning actions:
Application install — installing an application instance.
Application start — starting an application instance.
Application stop — stopping an application instance.
Application renew — renewing an application instance.
Application update — updating an application instance.
Application delete — deleting an application instance.
- Application switch — switching an application instance.
For every service provisioning action, the corresponding list includes the following options:
Automatically — a service provisioning action is performed automatically.
- Manually — to complete a service provisioning action, a created manual operation must be approved by a manager (see Manual operations).
- Skip the Entry Point settings. They are not used in the current version of the platform.
- Click Create. The new connector is created and displayed in the list.