Creating an Account
Before an Account creation, create Account Classes (see Creating an Account Class) and Account Types (see Creating an Account Type).
Each created Account must be attached to at least one User. This User will have the Owner access level in the Customer Control Panel. The Owner can be automatically created when you are creating an Account or the Owner can be created in advance (see Creating a User).
The Owner has full financial and administrative control of the Account. The Account can have only one User with the Owner access level.
To create an Account:
- Sign in to Operator Control Panel.
- On the Navigation bar, go to Accounts (see Navigation).
- On the Accounts page, click Create account. The New Account page is displayed with the following groups of elements:
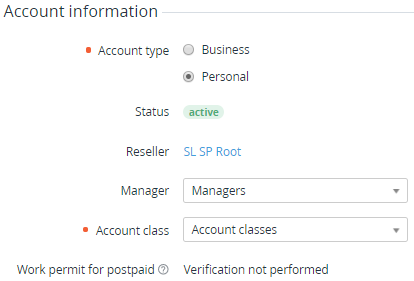
- Account information
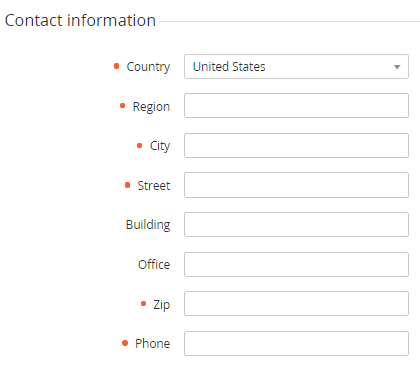
- Contact information
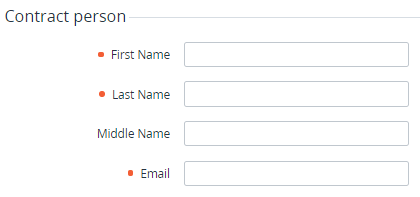
- Contract person
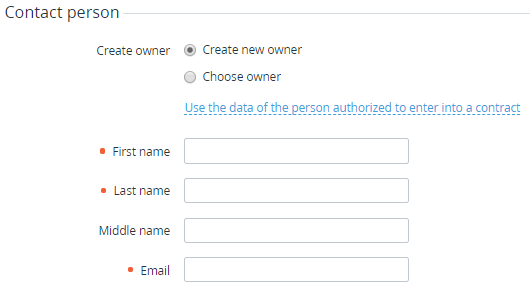
- Contact person
- Agreements
- Attributes
- In the Account information group:
- Select the Account type: Personal to create an account for the natural person or Business to add an Account for a legal entity (to create another Account type, see Creating an Account Type).
- Optionally, in the Manager list, select the personal Manager for the Account.
- In the Account class list, select the required class of Accounts (for more information, see Account Classes).
A new Account is created with the Active status and has the Work permit for postpaid attribute set to Verification not performed (see Managing Account's permission to use the Postpay model).
In the Contact information group, enter the address information of the Account which is needed to solve administrative, billing, and technical issues.
The default value of the Country list and the ability to select a country are defined in the system settings (see General system settings).
It is not possible to use Crimea as the Region in the address information of a new Account.
In the Contract person group, enter the name and email of a person who has the right to sign contracts from the customer's side.
- In the Contact person group, select a User that will have the Owner access level to the Account:
- If the User has already been created (see Creating a User), select Choose owner and in the Owner list, select the created User which will be the Owner of this Account.
To create a new User, select Create owner and enter the name and email of the User. To copy contract person's data for the new Owner, click Use the data of the person authorized to enter into a contract.
If a Notification Template for the Account created Event was properly configured (see Notification Configuration), a Notification will be sent to the specified email with a one-time link to set the Account Owner password.
- If the User has already been created (see Creating a User), select Choose owner and in the Owner list, select the created User which will be the Owner of this Account.
If the Reseller activated acceptance of legal agreements for Accounts (see General system settings), in the Agreements group, specify information about the agreements accepted by the Account:
- To specify that the Account accepted the Terms and Conditions, make sure that in the Agree with Terms and Conditions field, the Accepted checkbox is selected.
- To make the Account accept the Terms and Conditions on the first signing in to the Customer Control Panel, in the Agree with Terms and Conditions field, clear the Accepted checkbox.
- To specify that the Account accepted the Terms and Conditions, make sure that in the Agree with Terms and Conditions field, the Accepted checkbox is selected.
In the Attributes group, enter the additional account information. The amount and type of elements in this group depend on the Account Type (see Creating an Account Type).
When a customer registers a domain, the Account contact information and additional attributes are sent to the registrar. Some registrars require the contacts that are presented in ASCII. If account contacts are entered in non-Latin letters, it is possible to re-enter contact information in ASCII.
- Click Create. The new account has been created and displayed on the List of Account (see Viewing the List of Accounts).


