
In this article:
Viewing the list of plan resources
To view the list of plan resources:
-
Go to Plans (see Navigation). The list of plans is displayed (see Viewing the list of plans).
-
Click the ID or name of the required plan. The plan details page is displayed (see Viewing and updating a plan).
-
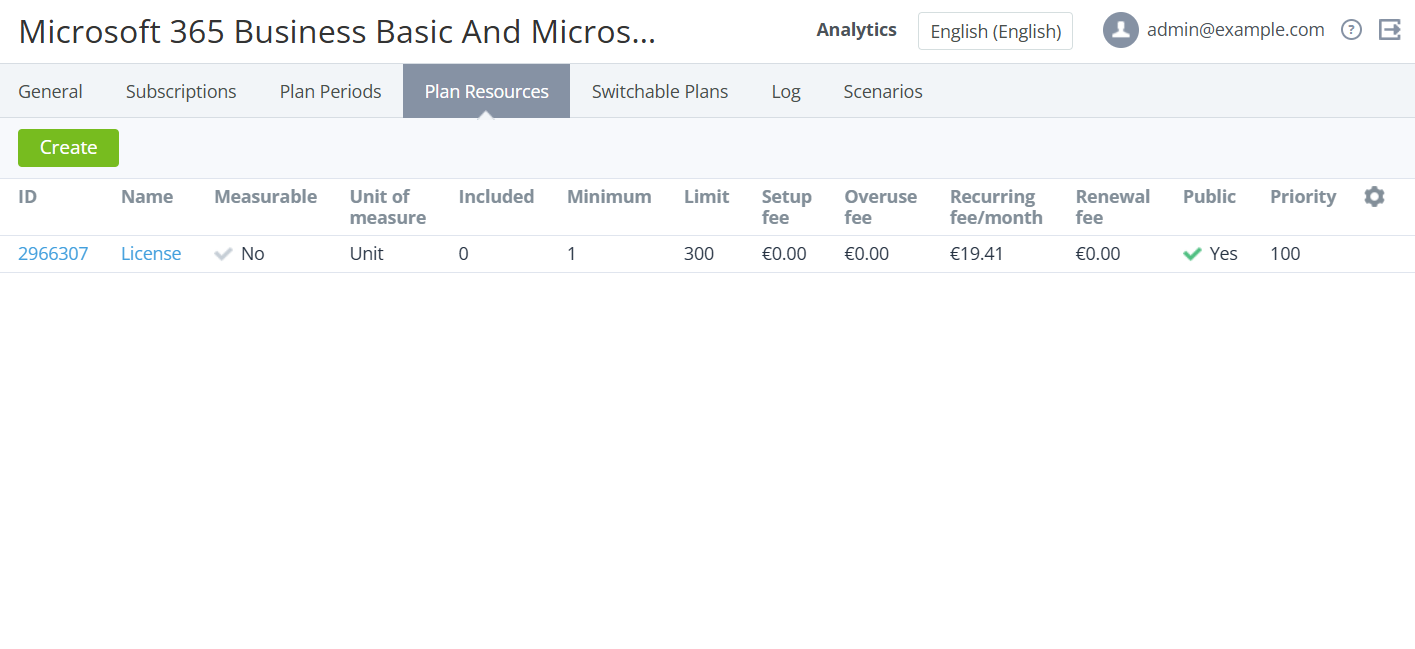
Go to the Plan Resources tab.
For plans with the Pay as you go (internal) billing type:
-
Units of Measure = resource/hour.
-
Instead of the Recurring Fee/Month column, the Unit fee column is displayed.
Adding a new plan resource
It is possible to add a resource to the plan only if there are resources created within the application template (see Managing connector resources) that are not yet included in the plan.
To add resources to the plan:
-
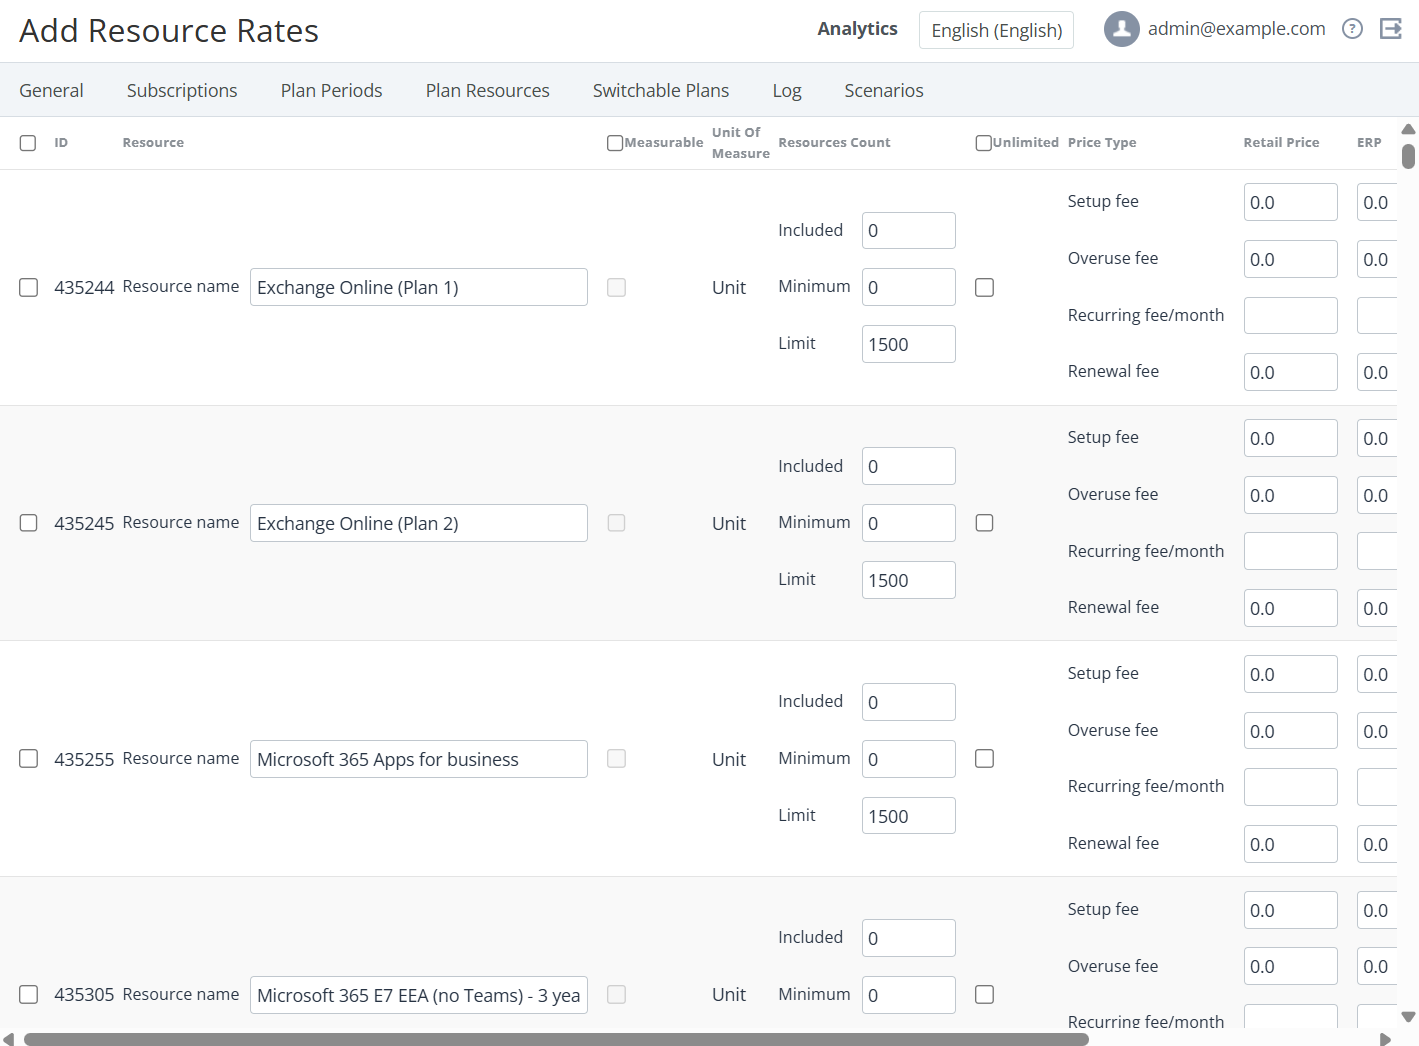
On the Plan Resources tab, click Create. The Add Resource Rates page is displayed.
-
In the rows with the resources to be added to the plan, select the checkboxes next to the resource ID.
To quickly find a resource in the list, use a built-in search of the browser (the keyboard shortcuts CTRL+F or ⌘ + F) by External ID. Depending on the plugin used for the service, External ID may represent the following:
-
The SKU of a resource based on the Office365 plugin. The value corresponds to the
offer_idadditional parameter of a charge. -
The SKU of a resource based on the MicrosoftCspProducts plugin. The value corresponds to the
sku_idadditional parameter of a charge. -
The key of a resource based on the Vendor Service Plugin (VSP). The value corresponds to the
resource_keyadditional parameter of a charge.
In other cases, External ID is not displayed. For the description of additional parameters of charges, see Charges.
-
Configure each resource similar to entering its information during the plan creation (see Plan Resources) but with the following specifics:
-
A new plan resource is automatically added to existing subscriptions too.
-
For subscriptions ordered at the individual prices:
-
The new resource gets the current price from the plan, but also gets the individual price flag.
-
The resource price is constant for the whole subscription period.
-
If the plan resource price is changed, the subscription resource price remains constant.
-
The net cost of the new resource depends on the Fixed price attribute:
-
For plans with the fixed price, the net cost of a new resource is constant till subscription renewing.
-
For plans without the fixed price, the net cost of a new resource is updated immediately.
-
-
While renewing, the price and net cost of a new resource are updated.
-
-
-
Click Save. The new resource is added and displayed on the Plan Resources tab. The automatic markup of the plan is not changed.
Updating a plan resource
To update a plan resource:
-
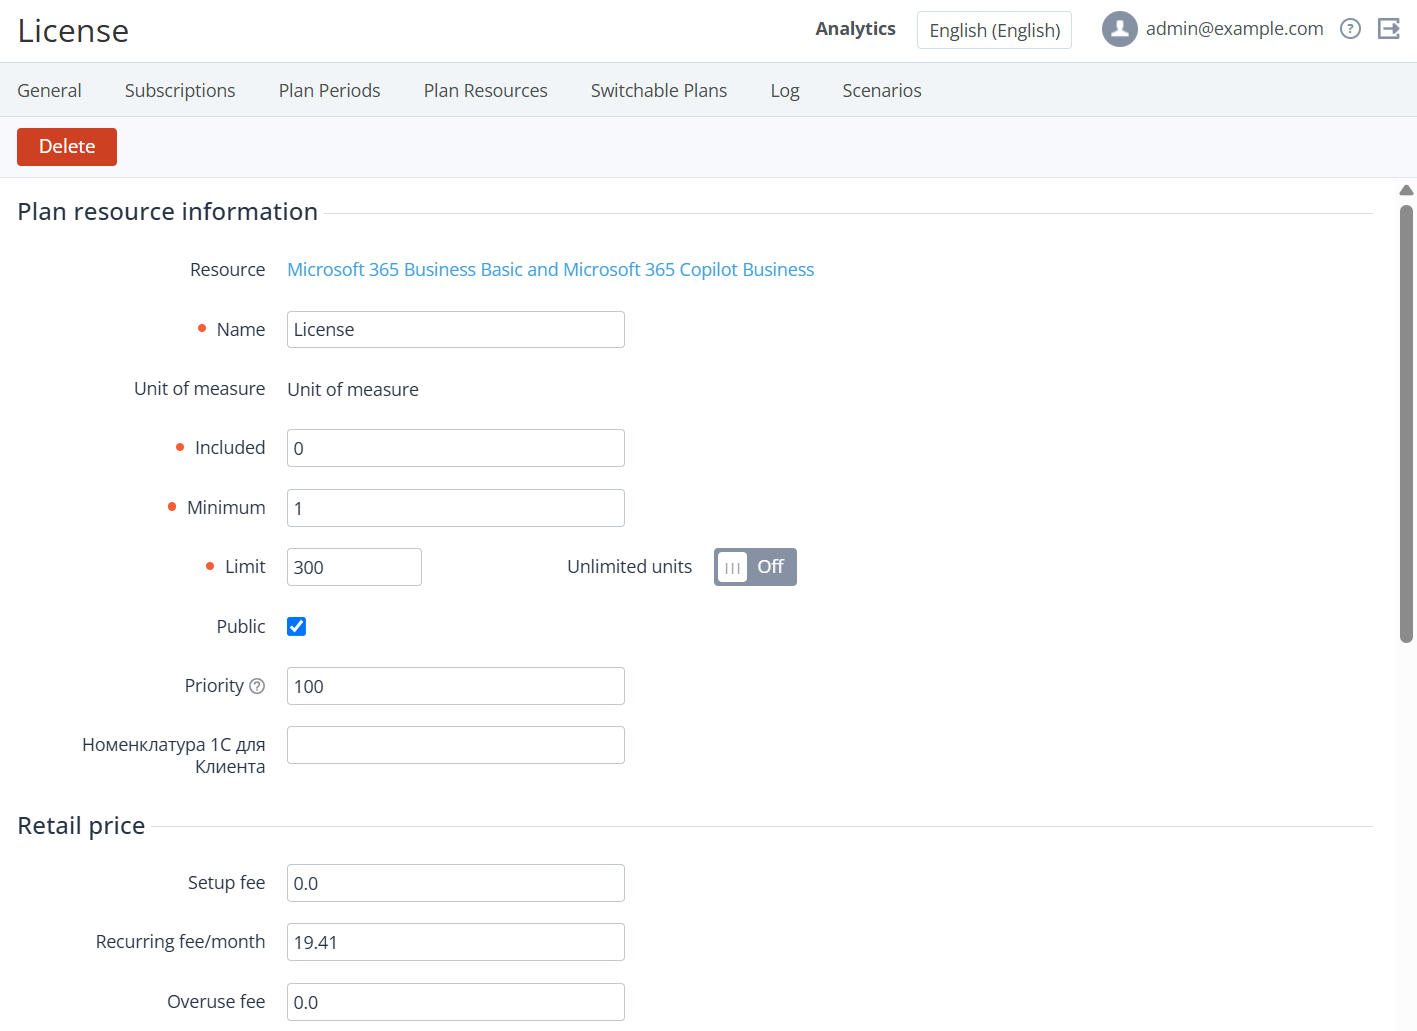
On the Plan Resources tab, click the ID or name of the required plan resource. The plan resource details page is displayed with the following groups of elements:
-
Plan resource information.
-
Retail price.
-
ERP.
-
Net cost.
-
-
Configure the resource similar to entering its information during the plan creation process (see Plan Resources) but with the following specifics:
-
When the retail prices for a resource are changed, the automatic markup for the plan is turned off (see Viewing the price list).
-
When only the ERP price for a plan resource is changed, the automatic markup for the plan is not changed. The retail prices for a plan resource are automatically recalculated according to the automatic markup if it is applied to the ERP price (see Viewing the price list).
-
When only the net costs for a plan resource are changed, the automatic markup for the plan is not changed. The retail prices for a plan resource are automatically recalculated according to the automatic markup if it is applied to the net cost (see Viewing the price list).
-
-
Click Save.
Deleting a plan resource
A resource can be deleted if only there are no subscriptions to this plan in any status, except for Deleted.
To delete a resource from the plan:
-
On the Plan Resources tab, click the ID or name of the required plan resource. The plan resource details page is displayed.
-
Click Delete and confirm the action.