Viewing and updating an Account's details
You can perform the following operation on the Account's details page:
Viewing Account's details
To view an Account's details:
- Sign in to the Operator Control Panel.
- On the Navigation Bar, click Operations > Operations > Accounts. The Workspace displays the List of Accounts.
- Click the ID or Name link for the required account. You will see the account details page, which consists of the following tabs:
- General — an account, contacts, balance information and custom fields of the current account. Also, you can type a note for account in the Notes field (see Adding Notes);
- Subscriptions — a list of the ordered subscription (see Viewing the List of Subscriptions);
- Orders — a list of the orders for the current account (see Viewing the List of Orders);
- Invoices — a list of the invoices for the current account (see Viewing the List of Invoices);
- Transactions — a list of the account transactions (see Viewing the List of Transactions);
- Payments — a list of the account payments (see Viewing the List of Payments);
- Guaranteed Payments — a list of the guaranteed payments (see Viewing List of Guaranteed Payments);
- Users — all users who were attached to the current account (see Viewing the List of Users);
- Notification Log - all notifications that were sent to the User with the Owner access level. Similar information is displayed on the Notifications Log (see Notifications Log).
- Event Log — a history of account changes. For more information see Viewing an Object Log.
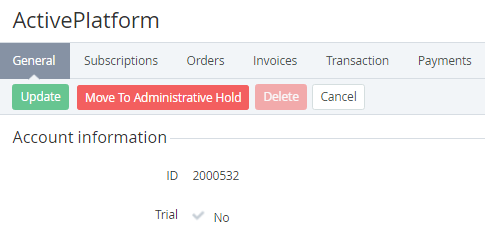
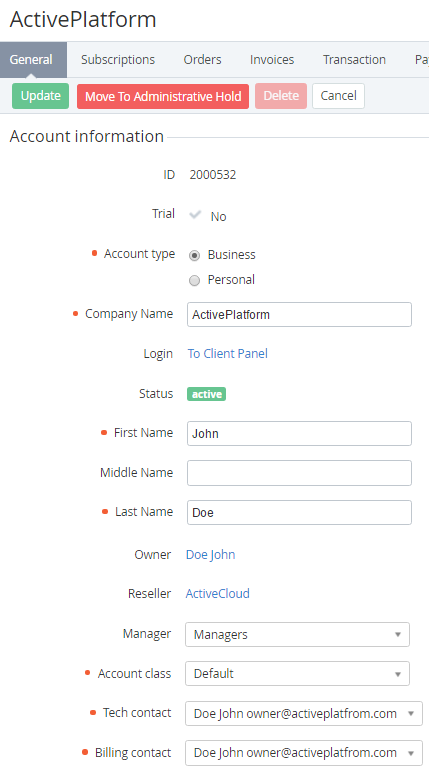
Viewing general information
The General tab contains the following account information:
- Account information displays the general and contact information that is specified when the account is creating (see Creating an Account).
- ID - a unique identification number of the account;
- Trial — an account attribute for customer who ordered a trial subscription (then customer will have to complete the full registration);
- Account Type — an account type (see Account Types);
- Company name - a company name, if the customer is a legal entity;
- Login - signing in to the Customer Control Panel using customer credentials (see Log in to the Customer Control Panel);
- Status — one of the following Account statuses:
Active - an Account is available for any possible operation (for more information see Managing Account statuses);
Administrative hold - an Account was blocked by Manager (see Moving an Account to the Administrative hold);
Credit hold - an Account was blocked automatically due to the debt on the Account Balance (see Credit hold of the Account). You can set the parameters of moving an Account to the credit hold in the Account class, to which the Account relates (see Account Classes).
Deleted - an Account was deleted by Manager (see Deleting an Account).
- First Name, Middle Name and Last Name - a name of account representative;
- Owner — a link to the User page with the Owner access level;
- - a link to the Reseller for this account (see Viewing and updating Reseller general information);
- Manager — selecting a personal manager for the current account;
Account Class — a term of accounts (see Account Classes);
If the Account has a Subscription with the status that is different from the Deleted status, the Account Class list will contain only Account Classes that use the same Payment Model (see Account Classes). If the Account doesn't have Subscriptions or have only Subscriptions with the Deleted status, the Account Class list will contain all Account Classes.
- Tech contact and Billing contact - account users, which are responsible for the technical and financial matters, respectively.
- Balance information appears the following parameters:
- Balance — a current balance value and a number of blocked funds (see Viewing the List of Charges).
- Credit Limit - the limit, within which the Account balance can be negative without moving to the Credit hold status (see Credit hold of the Account), during the Subzero period. System value of the credit is set for all accounts, which belong to the particular Account Class (see Account Classes). The credit limit is set by the Use from Account Class switch:
- On - value from the Credit limit field on the account class page (see Creating an Account Class);
- Off - value from the Credit limit field on the current account page.
- Created at — a date and time of account creation.

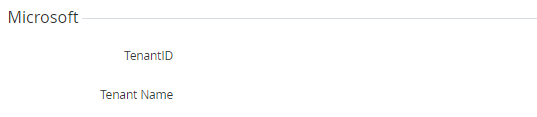
- Microsoft - account information from Microsoft Partner Center, which is displayed after the first Microsoft CSP Subscription has been ordered:
- TenantID - Microsoft Tenant ID (GUID) of the Account;
- Tenant Name - Microsoft Tenant Name (domain name) of the Account.
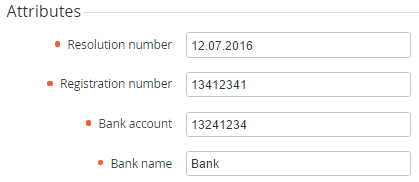
- Attributes — additional account information. It depends on the Account Type (see Account Types).
Updating an Account
To edit an Account information:
- Sign in to the Operator Control Panel.
- Click Operations > Operations > Accounts on the Navigation Bar. The Workspace displays the List of Accounts.
- Click the ID or Name link of the required account.
- You can edit the values in the fields, which are available for editing on the General tab.
- Also, you can change the type of account (personal or business) using the Account type option.
You can manually change the system value of the credit limit: set Use from Account Class in the Off position and type the value in the Credit limit field. The system value of the credit limit is set for all accounts that belong to the Account Class (see Creating an Account Class). If you want to use system value set Use system in the On position.
An Account can use funds within the credit limit only if the Pay with negative balance checkbox in the relevant Account Class is selected (see Creating an Account Class). If the Pay with negative balance checkbox is not selected then credit limit is ignored and Account Balance cannot become negative (see Examples of Account Classes).
- On the Toolbar click the Update button to save changes.
Furthermore, on the General tab you can perform the following operation: