Buy subscription
In this article:
General info
Purchasing a subscription includes several steps. You select resources for a subscription, the provision date (the start date of a subscription), and set additional parameters that depend on the service. If you completed only a quick registration (see Quick and full registration), you also create an account on one of the steps. After placing an order:
- For a delayed order, the provision of a new subscription is postponed until the selected date. After paying for an order (within the Prepay model) or after creating it (within the Postpay model), you still can cancel the order (see Cancel order) or change it (see Edit order) and select a different subscription period and change the quantity of resources.
- For a trial subscription, a payment linked to an order is not created. A trial subscription starts on the selected date for free.
- For a subscription within the Prepay model, a payment linked to an order is created. A new subscription starts only after you pay (see Pay payment). All subsequent orders for a subscription will also require paying in advance before using the service.
- For a subscription within the Postpay model, a payment linked to an order is not created. A new subscription starts on the selected date without paying for it. You pay after using the service — in the next month, by one payment for all subscriptions within the Postpay model of your account (see also Closing documents).
- For ordering the first commercial subscription within the Postpay model for your account, your reseller may require manual approval by a manager. After placing the first order, wait for approval or contact the support team (see Help). For details, see Specifics of postpaid subscriptions.
- For some subscriptions, cancelling within a limited period after their activation can be available (see Delete subscription).
The payment model of a subscription cannot be selected or changed via the Customer Control Panel. It is defined by service terms applied to your account by the reseller. If you need to buy a subscription within another payment model, contact your manager.
Due to the imposed restrictions, purchasing a subscription to some products may not be available for your account. In this case, or if the platform fails to complete the validation process, an explaining message is displayed. Contact the support team (see Help) or try to repeat all the steps one more time.
Order new subscription
To order a new subscription, complete the following steps:
For a prepaid subscription, pay the payment linked to the created order (see Pay payment).
If the order amount is 0 or it is a postpaid subscription, after creating an order, the list of subscriptions is displayed with the ordered subscription in the top row (see List of subscriptions).
Select plan
To select a plan for a subscription:
Go to the catalog by clicking any of the following elements:
- In the navigation menu — Catalog (see Screen layout).
- On the Main page (see Main page):
- In the Subscriptions and payments widget — Buy subscription.
- In the Trending now widget — Catalog or any product card.
- In the list of subscriptions — Buy subscription (см. List of subscriptions).
- Select a product category, product, and a plan for a subscription.
If you order a subscription via the external catalog, you may need to log in to the Customer Control Panel (see Log in to the Customer Control Panel) or complete the quick registration (see Quick registration) to proceed.
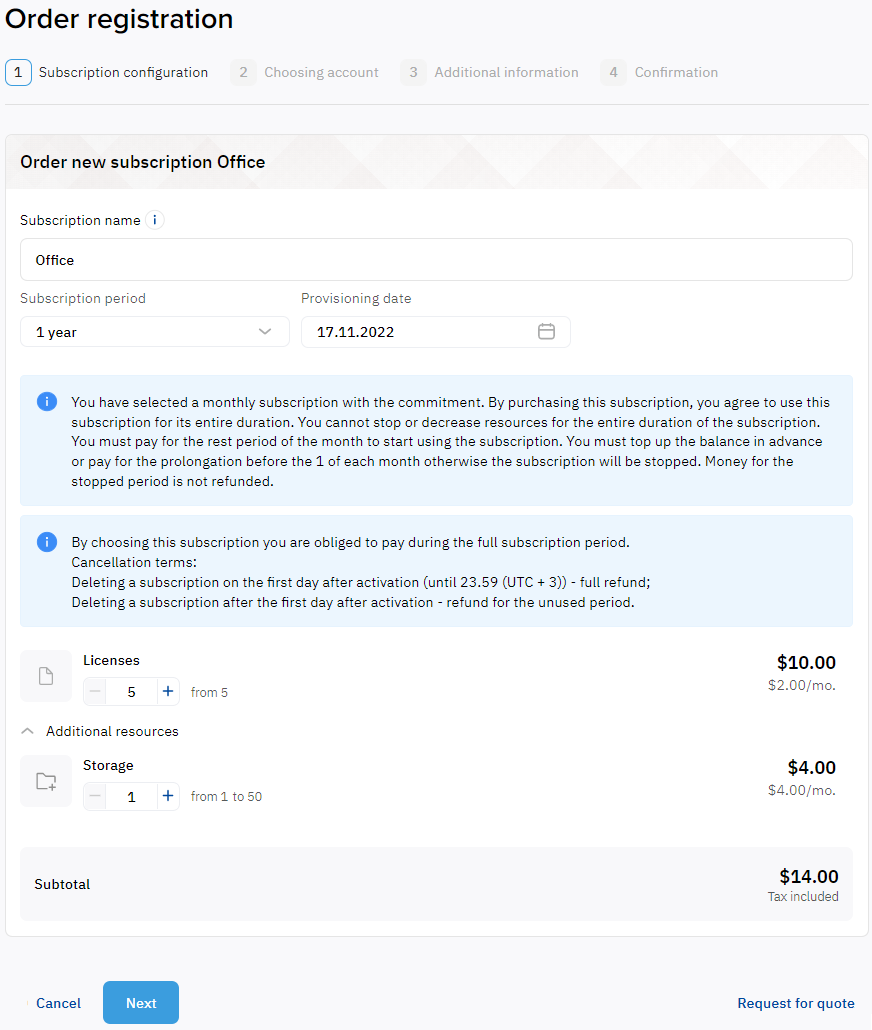
Subscription configuration
On the Subscription configuration step:
- Optionally, in the Subscription name field, enter a custom name of the subscription. By default, the plan name is used to generate the subscription name. A custom name helps you to find a subscription among other subscriptions to the same plan. You can also rename the subscription after purchase.
- Check the selected period of a subscription. If necessary, change it.
- In the Provisioning date field, select the start date of a subscription:
- The current date (by default) — your subscription starts immediately after you pay for the order (within the Prepay model) or after you create the order (within the Postpay model and free trial subscriptions).
- The selected date within 15 days — the start of your subscription is postponed, and you can cancel the order (see Cancel order) or change it (see Edit order) and select a different subscription period and change the quantity of resources before the selected date.
- Read the billing rules of a subscription, applied obligations, and cancellation terms.
Set the quantity of resources in a subscription. Skip this step if changing the quantity of resources is not available or the list of resources is not displayed. The resource management in the platform is not available for trial subscriptions to some services or when all information about resources of a pay-as-you-go subscription is stored on the service side.
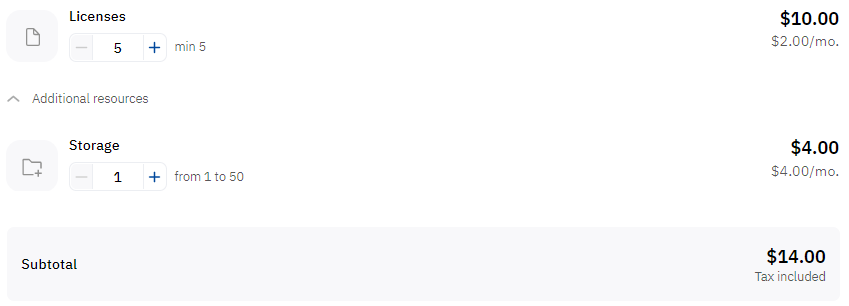
The primary resource is displayed separately in the top row. Other resources are grouped as Additional resources. If a plan does not have the primary resource, all resources are displayed together.
For every resource, the following information is displayed:
- The name of a resource.
- The ordered number of resource units, buttons for changing it, and information about the limits.
- The resource unit price that may include:
- A recurring payment per charging period (a month or whole subscription period).
A one-time payment for setup.
The cost of the ordered quantity of a resource for the charging period.
Below the list of resources, the following information is displayed:
- The total cost of all ordered resources for the charging period, excluding possible discounts.
- Taxes, if they are applied to your orders:
- Tax not included — taxes will be calculated and added to the order amount on the confirmation step or later by a third-party system.
Tax included — taxes are already included in the prices.
If only one tax is applied, its name and rate are displayed.
To change the ordered number of resource units, in the a with the required resource, specify its quantity using any of the following methods:
- Click
 or
or  to collect the required number.
 Type the required number using your keyboard.
Please note a hint with information about the available range for a resource:
- Included — the quantity of a resource included in the subscription cost. You only pay for any quantity above the included.
- From or Min — the minimal quantity of a resource mandatory for ordering.
- To or Max — the maximum quantity of a resource available for ordering.
If you enter a value out of the available range, the element gets the red color:
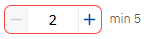
Check the hint and enter the correct value.
You can request a price quote from the reseller by clicking Request for quote. For more information, see Quotes.
- Click Next.
On the Subscription configuration step, all prices are displayed in the plan currency. If the currency your reseller uses to bill your account differs, the prices will be recalculated on the Confirmation step.
Choosing account
On the Choosing account step:
- Select for which account you want to order a subscription:
- Exist account — in the list, select one of the accounts associated with your current user. You can find an account in the list by part of its number or name. Start entering the number or name of the required account. The list of accounts is automatically updated regarding your input. By default, your current account is selected.
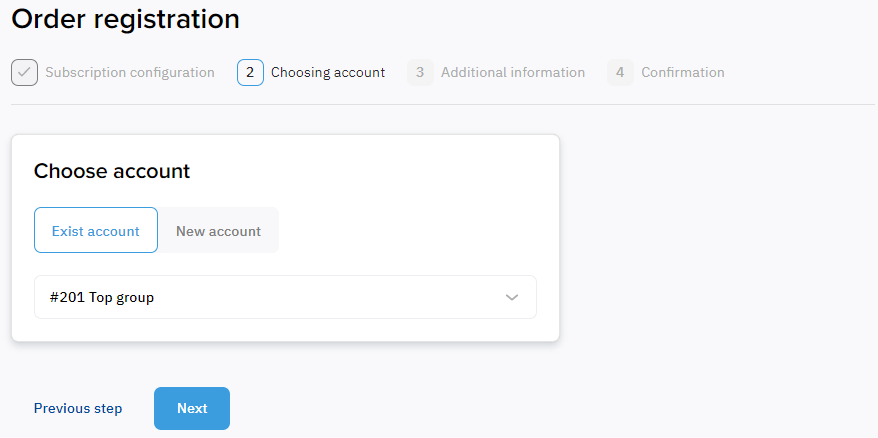
- New account — create a new account. Your current user becomes its Owner. After the order confirmation, the platform switches you to the Customer Control Panel of the created account. For a detailed description of the procedure, see Full registration. The New account option is selected by default if you did not yet complete the full registration or your current user does not have any suitable associated accounts.
- Exist account — in the list, select one of the accounts associated with your current user. You can find an account in the list by part of its number or name. Start entering the number or name of the required account. The list of accounts is automatically updated regarding your input. By default, your current account is selected.
- Click Next.
Additional information
Depending on the service, you may need to set additional parameters for a subscription. For details, see Services. User documentation.
For example, for a subscription with manual approval, specify the sets of values of parameters for every resource unit added to a subscription.
If no additional parameters are required, this step is skipped automatically.
Confirmation
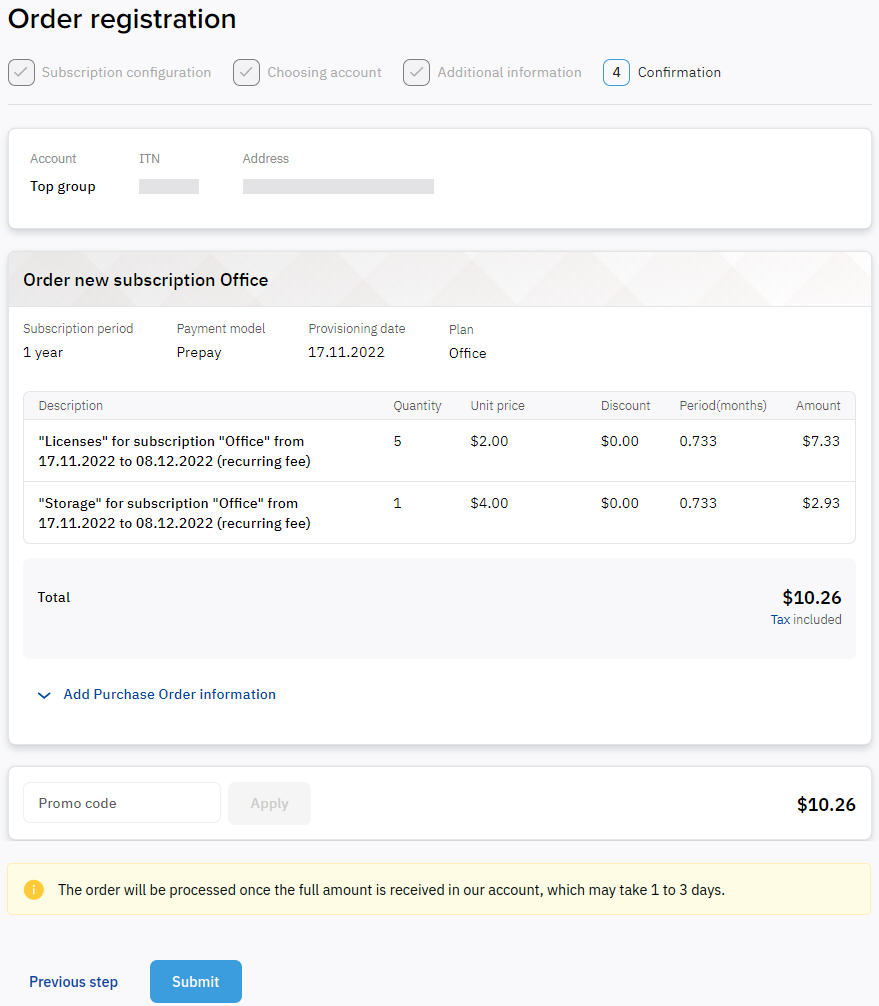
On the Confirmation step:
- Check the following information:
- The selected account for a subscription.
- The selected period of a subscription.
- The payment model of a subscription:
- Prepay — you pay in advance, before using the service, by a separate payment for every order.
- Postpay — you pay after using the service, by one payment in the next month.
- The provisioning date.
- The plan name.
- The description of ordered items, including the names of resources and the subscription, covered period, and price type.
- The order amount for the selected resource quantity, resource unit price, discount (if applied), and covered period (in months).
- The name, rate, and amount of every applied tax (if any) — click a link to view details:
- Tax included — taxes are included in the prices. If only one tax is applied, its name and rate are displayed.
- Tax not included — taxes will be calculated and added to the order amount later by a third-party system.
The discount amount (if applied).
For some prepaid pay-as-you-go subscriptions, the top-up payment may be required to start the service provisioning:
- The top-up amount is displayed in a separate row.
- The order amount is 0.
- A top-up payment is created with an order.
The top-up payment is required to make sure that an ordered subscription will not be stopped almost right after its activation:
- A prepaid pay-as-you-go subscription blocks funds on the account balance only for the quantity of resources consumed on the service side.
- Usually, the first consumption data from the service side is processed in the platform one hour after the subscription activation.
- The top-up payment is used to cover resource consumption.
- Depending on the service, the top-up amount can be fixed or defined by the ordered quantity of resources.
- If you have additional information about the order from your purchasing system (PO):
- Click Add Purchase Order information. A group of fields appears.
- In the PO Number field, enter the order number in your purchasing system (up to 100 characters).
- In the PO Document field, click Attach file and upload the order file from your purchasing system.
Information about the order from your purchasing system is optional, but some vendors may require it to confirm purchase.
The order file must contain:
- Contact information of the reseller.
- Contact information of the customer.
- Signature and company stamp.
- Number and date of the order.
- Name, quantity and price of the product.
The file must be non-editable (for example, PDF), and its size must be under 2 MB.
- If you have a promo code, to get a discount:
- Enter your promo code in the Promo code field and click Apply.
- Check the final amount of the order.
- Check the order and payment processing rules regarding the subscription type and payment model, except for trial and pay-as-you-go subscriptions.
- Click Submit.
On the Confirmation step, all prices are displayed in the currency your reseller uses to bill your account. If the plan and reseller currencies differ, the prices are recalculated using the actual exchange rate (see Main page).